 |
||
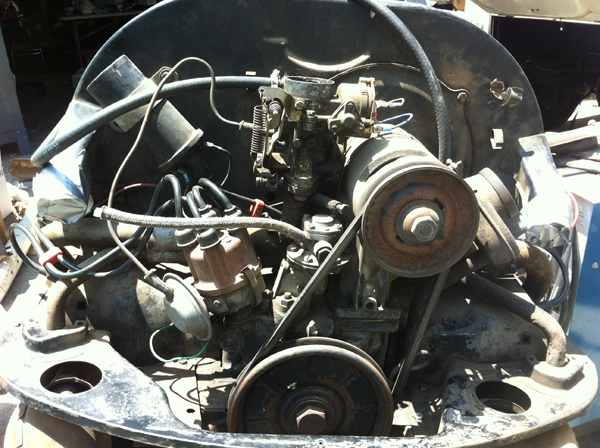
| We took a very interesting project on recently, wanting to know just how big of an improvement we could get by doing some bolt-on upgrades to an old beat up 1600cc single-port motor that we had laying around. We thought it would make interesting reading for our customers, and with any luck we'd have some cold, hard facts about our Kadron carbs and their potential when we were all done with the upgrades.
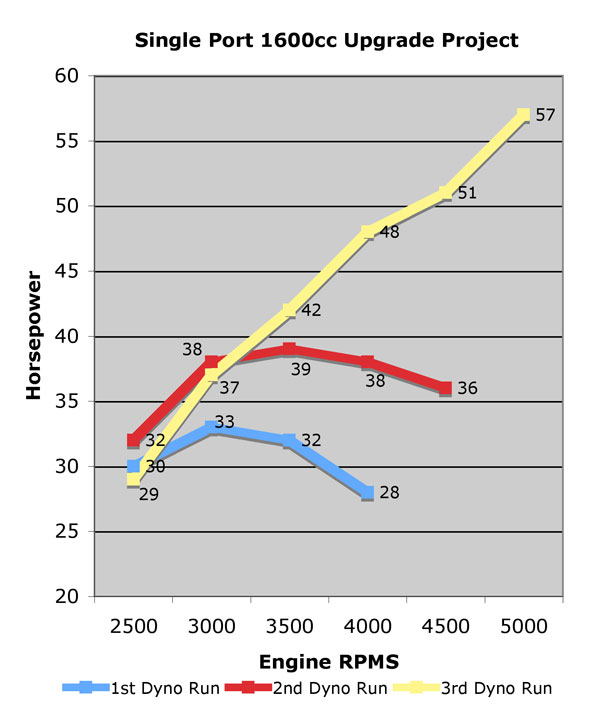
We needed to make sure we had a good motor to start with, first of all. We did a compression test on the motor. All compression looked good, between 140 psi and 145 psi on all cylinders, just so we knew that we had a decent test motor to start with. We put it on the run stand, fixed a couple of fuel leaks, and fired it up, complete with the stock carburetor and exhaust, just like it came from Wolfsburg with. It seemed to be running OK, so we took it to the dyno shop and ran it on the dyno. The results were documented on the "1st Dyno Run" on the chart at the bottom of this page. It make a whopping 33 horsepower, and seemed to taper off real quickly after 3000 RPM's, so we felt it was probably in need of a quick tune-up. We tuned it up, adjusted the vlaves, and changed the distributor over to a "009", since the factory distributor was not advancing properly. We also added a Pertronix electronic ignition and took it back to the dyno shop for a second run. The results of that run were documented as "Dyno Run #2". Noting that the motor made a significant improvement just with the tune up and adjustements, we decided it was then worthy of some upgrades. The 39 horsepower it made, and the better torque curve appeared to be a much more realistic place to start with the upgrades that would soon happen. |
||
 |
||
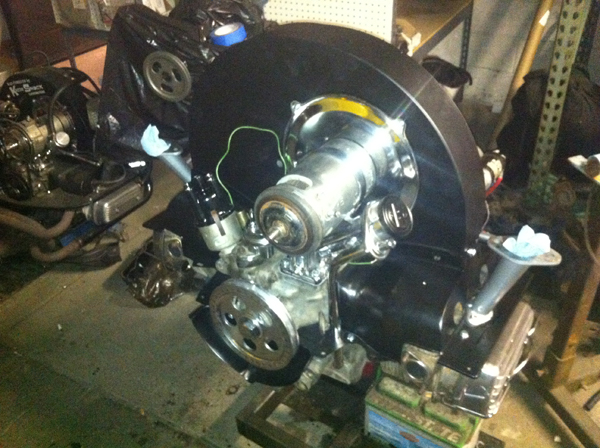
| Knowing we were going to be squeezing a little more juice out of this motor, we decided to strip it down, give everything a quick bath, and upgrade the oil cooler to a later doghouse cooler set-up. This requires drilling the 6mm studs out that hold the oil cooler to the case, and re-threading the hole on top for a larger stud. If you don't have a tap to thread the case, and adapter stud can be used. It also requires a different fan housing, the later (wider) fan with better air flow, and the installation of the cooler adpater and cooler itself. In addition to the fan shroud, the discharge tins must be replaced. This upgrade in cooling was definitely going to be needed for the additional power (and heat) that we'd be generating with the future upgrades. We took the opportunity to dress the engine up a bit while we were in there, and make it look a little snappier. | ||
 |
||
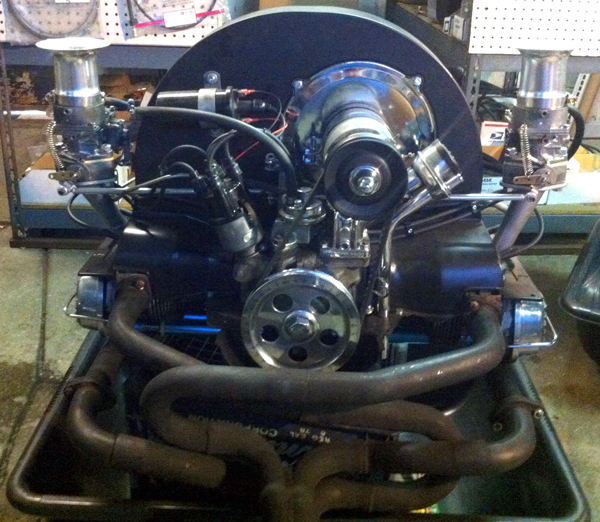
| Once this stuff was in place, we decided to install 1.4:1 ratio rockers on the heads, which requires the pushrods to be shortened about 1/4". The ratio rockers not only give more overall lift, they get the valve up faster and keep it up longer. It's a quick and easy way to get a little more poop without removing the heads and doing port work, or splitting the case and changing the cam. The extra horsepower usually amounts to 3 or 4 horses, but when you're starting with only about 40, THAT'S 10%!!!
You can shorten your existing aluminum pushrods, which is what we did in this case. You can also order chromoly ones, but for this build, it really wasn't necessary. While setting up the rockers, we noticed that we had three valve springs that were super soft. We could push them in easily with just a thumb. This was undoubtedly the result of the engine having been stored for a number of years without being turned over. We changed the valve springs with single hi-rev springs while we had the rockers off. A special tool is required to do this, but it usually won't need to be done if the car is in running condition unless the springs are super soft. You'll also notice we installed some alumninum valve covers, a new gen stand, and the single port Kaddie manifolds. |
||
 |
||
| We also installed a 1-5/8" exhaust system (don't do this on a dual port!) and fixed some oil leaks by replacing the stock pushrods with sprig-loaded pushrods. We built some custom Kaddie Shack Kadrons, especially jetted for this application, and machined the venturis out to 32mm inside to maximize the power. These work great with this combo. Not being able to resist, we also instaled the velocity stacks, which actually can make a bit of difference, if jetted accordingly. Of course, special jetting was needed to maximize the output of this motor, and keep it drivable. We used our dual-cam linkage to keep everything in synch, and it really started to look pretty nice.
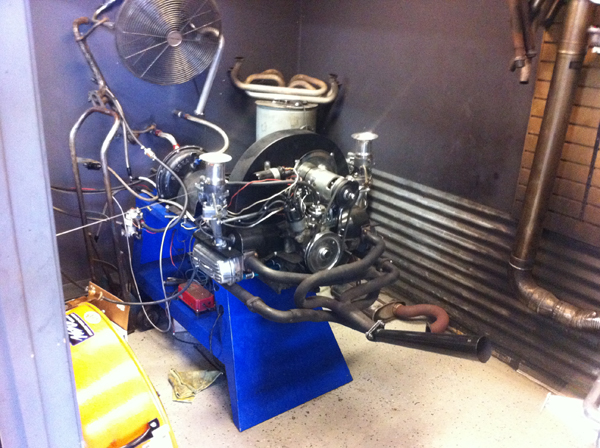
Ya gotta have a little fun with projects like this! I think the chrome fuel pump might add a little extra power (just kidding... no emails please!) so we couldn't resist adding that, too. We added a stinger, just to make sure everyone knew this thing was coming when it was time to fire it up. Time for one last trip to the dyno shop! |
||
 |
||
| When all was said and done, we were really pleased with the results. We got 57 horsepower out of that old engine, and moved the powerband up to where we could have a little fun with it! That's a 73% increase in power from where we started from, and and a 46% increase over the 39 horses we started with when it was running OK in stock form! That's a HUGE improvement. Way cool! The power band moved up where we'll actually be able to have a little fun driving the thing without having to lug the engine by short shifting. We didn't dyno it past 5000 RPM's, but this little moster was still pulling hard when we pulled the plug. It'll likely top out at a little over 60 horses. We were quite satisfied at 5K for now.
The best thing: All of this stuff was done without having to remove the heads. In fact, it can all be done in the car! The goal was to see what simple bolt-on upgrades could be done my the average guy in his backyard without having to go too deep into the motor to do 'em. I think we have a pretty good idea, now. If you're interested in any of these upgrades for your own motor, please send us an email, or give us a call. We're happy to help! |
||
 |
||